Pages

Friday, December 16, 2011

Chocolate Coconut Cookies


There are certain moments when everything seems possible, when fairy-tales come real, when one can see beyond the imaginary frontiers of the universe. Maybe being a daydreamer what I am makes it easy to believe and see.


I was having a coffee with a friend today and she said her son who is 4 still believes in Santa. I'm 29 and I do believe into the magic with all my heart. Does that make me too naïve? So what? I do believe in the Santa spirit and love the emotions that Christmas brings. The smell of cookies, mulled wine, all the family and friends gatherings. Isn't that what Christmas is all about. I'm not very fond of the commercial side of the holiday – all the shopping and gift giving that turns out quite useless most of the times.


When I was a child there were no fancy toys, there was no Santa. I don't even remember if we ever celebrated Christmas. This was a capitalistic holiday. All we celebrated was the New Year Eve. Of course, there were presents for the children, but the choice wasn't so great. I always received a doll, although never played with it.

But although without the Christmas fuss I was a happy child. This was the time when my mother would make us pancakes for breakfast and we would eat them while stirring vigorously some rye coffee with water in order to make it into foam. Then my father would pack up me and my sister into the sledge and would take us to kids' cinema. And later at night I would read fairy-tales to my sister.

One of my favourite fairy-tales was about a tailor in whose workshop there were little creatures springing to life during the night and helping him with his work. I've had countless sleepless nights stalking for little creatures.

Now they've come to our kitchen :)


Chocolate Coconut Cookies Recipe:
Makes around 60 cookies
Adapted from Mad About Maida 

For the Filling:
  • 85 gr cream cheese;
  • ½ tsp vanilla extract;
  • 60 gr granulated sugar;
  • 90 gr dessicated coconut;
  • 60 gr ground walnuts.
Whisk the cheese until creamy, then whisk in the vanilla extract and the sugar. Mix in the coconut and the walnuts.

Spread a sheet of parchment paper or plastic wrap. Using your hands shape the mixture into a long log, then wrap it into the prepared wrap. I formed the filling into two 35cm long logs but they were a little bit hard to handle, so the next time I would form it into several smaller logs. Refrigerate for a couple of hours.

For the Chocolate Dough:

  • 185 gr all purpose flour;
  • ½ tsp baking powder;
  • pinch of salt;
  • 100 gr confectionner's sugar;
  • 55 gr dark chocolate, melted;
  • 90 gr cold butter, cut into 1 cm pieces;
  • 1 tsp vanilla extract;
  • 1 egg.
Note: The original recipe suggests using a different method for the dough but I prefer my favourite “all goes to the food processor” method.

Place flour, salt, baking powder and sugar in the bowl of the food processor, equipped with the metal blade, and pulse to combine. Add in cold butter pieces and pulse a couple of times until crumbly. Add in egg, vanilla and melted chocolate and pulse just to form dough. Gather the dough to a ball, flatten it to a disk, wrap in plastic wrap and refrigerate for 4 hours.

Take out of the fridge. On a lightly floured counter top, roll out the dough, then cut it to strips the length of the filling logs. Place the filling log over the chocolate dough strips and roll up like sushi, besides sushi mat could be of help here. Wrap in plastic (reuse the plastic wrap from the filling!) and refrigerate for an hour.

Preheat the oven to 180ºC. Line a baking sheet with silpat. Cut the log into 1 cm slices. Press each slice between your palms to flatten it a bit– I didn't do this with the first batch that went into the oven since I expected the cookies to spread but they didn't and some pretty fat cookies came out of the oven, so do give them a little face-lift.

Bake cookies for 6-7 minute, although it depends of their size. Cool on a wire rack.


Wednesday, December 14, 2011

Candied Ginger – Milk Chocolate – Roasted Pineapple Tartlets


We made these tartlets some time ago(believe it or not but it was in April) and they were extremely delicious but I never found time to write down the recipe. Since I've promised myself to finish all the things initiated through the year before its end there was no more time for procrastinating.

The original recipe is from Larousse du Chocolat by Pierre Hermé, but we changed it a little bit by making the crust gluten free, and using the syrup from the candied ginger for roasting the pineapple.


Candied Ginger – Milk Chocolate – Roasted Pineapple Tartlets
Recipe:
Based on Pierre Hermé's Tart au chocolat au lait et à l'ananas rôti from Larousse du Chocolat

For the Crust:

Makes 6 8,5cm tartlets
  • 110 gr cold butter, cut in 1cm pieces;
  • 60 gr confectionners' sugar;
  • 3 egg yolks;
  • 60 gr tapioca flour;
  • 75 gr millet flour;
  • 45 gr rice flour;
  • 45 gr corn starch;
  • 20 gr almond meal;
  • pinch of salt.
Place all flours, almond meal, sugar and salt in a food processor, equipped with the metal blade, and pulse a couple of times to combine all the dry ingredients. Add in butter and pulse several more times until large crumbs form. Add in egg yolks and pulse just to combine. Gather the dough, wrap it in plastic wrap and place it in the fridge for at least 4 hours.

Take the dough out of the fridge. On a lightly floured counter top, roll the dough out to 3mm and line 6 tartlet rings with it. Place the rings on a lined with silpat (or paper) baking sheet. Poke the bottom of the tartlets a few times with a fork. Refrigerate for half a hour.

Meanwhile preheat the oven to 180ºC.

Take the shells out of the fridge and prepare them for blind baking – place a piece of aluminium foil in each shell, then fill with dry baking beans. Bake tartlet shells for 10 minutes (till the edges just start to turn golden), then remove the dry beans and bake for further 10 to 15 minutes or until goden brown. Transfer the shells to a wire rack and let them cool.

For the Candied Ginger:
  • 150 gr fresh ginger, peeled;
  • 300 gr water;
  • 300 gr granulated sugar.
Cut ginger into thin slices. Place them in a heavy bottom sauce pan and cover with water. Bring to a boil, then simmer for a minute. Discard the water (I like to drink it as a tea sweetened with some jaggery). Cover with fresh water and repeat the procedure for 2 more times. 3 times in total.

Combine water and sugar and bring to a boil. When sugar dissolves add in the drained ginger slices. Cook till the temperature reaches 106ºC. Remove from heat and let the ginger steep overnight in the sugar syrup before using it.

The next day the ginger slices are ready to be used. On the other hand the syrup will be used for roasting the pineapple into it.

Since the recipe makes more than needed you could keep the rest for future needs. Just strain the ginger slices and lay them on a wire rack – leave them for a day this way to let all the unnecessary syrup to drip off. Then roll them in granulated sugar, place them in a jar and keep them in the refrigerator for up to a year.


For the Roasted Pineapple:
  • 1 pineapple;
  • ginger sugar syrup (from the recipe above);
  • 1 vanilla pod;
  • 3 allspice berries;
  • 2 Tbsp rum.
Preheat the oven to 230ºC.

Pour the ginger sugar syrup in a gratin dish, add in allspice berries and rum. Cut vanilla pod lengthwise, scrape the seeds and add both seeds and pod to the syrup.

Trim off the top and the bottom of the pineapple, then peel it. Insert a bamboo skewer lengthwise in the center of the pineapple leaving both ends of the skewer hanging out, so you could easier rotate the pineapple during baking.

Place the pineapple into the dish with the syrup and bake for an hour – an hour and a quarter. During baking, use both ends of the skewer as handles to rotate the pineapple 4-5 times so the syrup soaks from all the sides.

Remove from the oven and let cool completely.

Take out the skewer and prepare yourself for the messy part. Cut lengthwise the pineapple in quarters and remove the hard core. (We actually sliced the pineapple crosswise, then removed the core using a cutting ring). Cut each quarter in three, then slice crosswise and return slices into the syrup. At this point the pineapple should be ready to be used but ours looked a little bit under baked from inside so we baked it at 200ºC for further 20 minutes submerged in the syrup.

Keep pineapple slices in the fridge, submerged in the syrup till needed.


For the Milk Chocolate Ganache:
  • 180 gr milk chocolate (we used Cacao Barry's Ghana chocolate which contains 40,5% cocoa solids);
  • 150 gr butter, room temperature;
  • 110 ml whole milk;
  • 45 gr candied ginger, chopped to small pieces – 2-3mm.
Bring the milk to a boil, then pour it over the chocolate. Leave it for a minute, then stir until homogenous. Add in the butter and stir to combine, then mix in the chopped candied ginger.

Assembling:

Divide the ganache among the tartlet shells and refrigerate. Take out of the fridge an hour before serving.

Arrange the pineapple slices just before serving.


Friday, December 9, 2011

Chocolate Walnut Muscovado Cookies


Almost every Sunday I bake cookies for Ivan to take to work for his tea pause. So I'm always in search for new cookie recipes. When I'm out of inspiration I stick to the classic shortbread cookie or just transform a recipe I've already done. These cookies fall under the latter case.


We used to make them often at the hotel during the pastry course this summer, since they served them with the coffee. The original recipe, beside of being multiplied by 10, uses hazelnuts – coarsely chopped. But since we are short on hazelnuts and overloaded with walnuts, my choice was obvious. Furthermore Ivan prefers the nuts to be ground, so I took it in consideration. As a consequence, not only the taste but the texture too happened to be very different. However, Ivan liked them, so did his colleagues.


Chocolate Walnut Muscovado Cookies Recipe:
Makes 60 – 70 cookies
  • 125 gr butter, soften;
  • 2 eggs;
  • 150 gr all purpose flour;
  • 5 gr baking powder;
  • 75 gr ground walnuts;
  • 85 gr dark chocolate, cut into small chunks;
  • pinch of salt;
  • 70 gr light muscovado sugar;
  • 60 gr granulated sugar.
Preheat the oven to 180ºC. Line with silpat or paper 2 baking sheets. I've noticed my oven bakes cookies better if using only the middle rack, so I bake only 1 sheet at a time, but preparing 2 sheets I already have one cooled and ready for cookies to be piped on it.

Combine together the dry ingredients – flour, baking powder, walnuts, chocolate, salt and the two types of sugar.

In a large bowl beat the butter until creamy and fluffy, then beat in eggs, one at a time. Then add in the dry ingredients and mix shortly just till combined. The idea is not to overwork the sugar in order not to melt it. Thus after baking the sugar grains will give a pleasant crunch to the cookies. Transfer to a piping bag equipped with plain tip and pipe the batter onto the baking sheets leaving some space between them. Bake for 6-7 minutes, until golden brown on the edges. The time depends according to the size of cookies. Transfer to a wire rack and let cool.


Wednesday, December 7, 2011

Moelleux au Chocolat with Avocado Mousse


Merde!”- cursed the french salesgirl when my sister specified exactly which piece of moelleux au chocolat she'd like. Of course it was the biggest one. And knowing what goodness lurks in it wouldn't you ask for the biggest piece if you had such a choice. Me and my sister exchanged startled glances then we couldn't help but chuckle in bulgarian which startled the salesgirl. However, this incident didn't stop as from returning back to the same pâtisserie for a moelleux au chocolat indulgence. Although almost everywhere in Paris the moelleux au chocolat is worth trying. 

Ever since we've made this chocolate-avocado entremet my love for this combination grew stronger and stronger, just because the deep and heavy chocolate flavour pairs extremely well with the fresh grassy avocado taste, especially in this rich and decadent cake. 
 

Moelleux au Chocolat with Avocado Mousse Recipe:

For the Moelleux au Chocolat:
  • 140 gr dark chocolate 75% cocoa (I used Cacao Barry's Sao Tome, since it has a deep, earthy, volcanic flavour, but any dark chocolate will work out);
  • 100 gr butter,
  • 5 egg yolks;
  • 30 gr flour;
  • 4 egg whites;
  • 75 gr granulated sugar;
  • pinch of salt.
Preheat the oven to 160ºC.
Melt chocolate together with the butter.
In a bowl, beat egg yolks with a third of the sugar until light and fluffy. Beat in flour, then still using your hand mixer, combine in the butter-chocolate mixture.
In another bowl beat egg whites, salt and the rest of the sugar till glossy stiff peaks. Using a spatula fold the meringue into the yolks-chocolate mixture. Pour the batter into a 19-20cm buttered ring laid onto lined with paper baking sheet. If using a baking pan – line with paper or butter and flour it generously.
Bake for 20 – 25 minutes. Leave it to cool (I didn't transfer it onto a wire rack since it's a fragile cake especially while still warm). Refrigerate overnight or at least for 4 hours.

For the Avocado Mousse:

  • 1 ripe avocado;
  • 1 ½ Tbsp freshly squeezed lemon juice;
  • pinch of salt;
    25 gr sugar;
  • 10 gr water;
  • 80 ml heavy cream.
Heat sugar and water to dissolve the sugar, let it cool. Whip the cream to soft peaks. Puree the avocado, lemon juice, salt and sugar syrup. Fold in the whipped cream. Transfer to a piping bag fitted with a star tip and pipe it on top of the moelleux au chocolat.

Note: Make the avocado mousse just before serving in order to be freshly green. It keeps well its colour for a day, afterwords it shades off. 


Thursday, December 1, 2011

Quince Frangipane Tartlets


Recently I found I'm extremely picky when it's about fruits mixed in desserts. There are certain fruits which I enjoy eating when raw but never or at least rarely when cooked. Like lemons, oranges, whatever citruses you name, if turned into curd – this is something I am definitely not fond of, but I do love them when candied and use lemon zest even more often than vanilla.

Normally I do like pears but the other day I made a pear-coconut tart that was so overpowered by the pears that for me it was a torture to eat it.

And bananas – they are not amongst my favourite fruits for baking but I found I adore them if mixed with jaggary, and there must always be rum (in bulk) – just because everything is better when boozy ;)


On the other hand apricots are my all times favourite fruit. And I think I just found another fruit love of mine – the quince – such a flavourful buttery deliciousness. Till past week my quince experience boiled down to quince jam (not made by me, I was only the eater). But then I saw quinces at the fruit and vegetable store below our apartment. And since it's rare to find them, I bought 3 kilos of them – I poached them, baked with them, made some quince paste (expect recipe soon)... And today I went for more. Unfortunately there were only 4 quinces left – now I'm looking at them as if they were “my precious”.


Quince Frangipane Tartlets
Recipe:
Makes: 10 tartlets 8,5cm in diameter

For the Crust:
  • 190 gr cake flour;
  • 70 gr confectionner's sugar;
  • 25 gr almond meal;
  • 2 gr salt;
  • 20 gr cocoa powder ( I used dutch-processed);
  • 110 gr cold butter;
  • 1 egg;
  • ½ tsp vanilla extract;
  • 10 gr rum.
In the bowl of your food processor equipped with the blade, place flour, sugar, salt, almond meal, cocoa powder and pulse a couple of time to combine all. Add in cold butter, cut into pieces and pulse several times to make it into small chunks. Add in egg, vanilla extract and rum and pulse several more times to combine. Actually I added rum because my egg wasn't very big.

Gather the dough, wrap it in plastic wrap and place it in the fridge for at least 4 hours, or even overnight.

Take the dough out of the fridge. On a lightly floured counter top, roll the dough out to 3mm and line 10 tartlet rings with it. Place the rings on a lined with silpat (or paper) baking sheet.


For the Frangipane:
Recipe, taken from Tartelette
  • 115 gr softened butter;
  • 115 gr honey;
  • 100 gr ground almonds;
  • 2 eggs;
  • 60 gr heavy cream;
  • 1/4 teaspoon cardamom.
Place the butter, honey, ground almonds, and the eggs in a large bowl and whisk until smooth (can also be done in a food processor). Add the cream and cardamom but stir in it instead of whisking not to emulsify it or it will rise while baking.

For the Quinces:
  • 2 quinces;
  • water.
Under running water, rub the quinces with your fingers or using a brush to remove the fuzz. Peel them, cut in 4 and remove the core. Cut each quarter crosswise into slices. Place slices in a saucepan, cover with water and bring to a simmer. Cook till fork tender – about 15 minutes. Drain quinces from water and let them cool.

Assemble and bake:

Preheat the oven to 180ºC.

Divide the frangipane among the tartlet rings, add a few quince slices on top and bake for around 25 minutes until the top is golden brown.

Note: I've put some home made apricot jam on top of half of the tartlets, just because I wanted to see if my two favourite fruits go on together. I think that the apricot flavour (maybe because it was more concentrated since it was from a jam) got over the quince, so I suggest you better leave it out.


Monday, November 28, 2011

Panettone


We don't have a fireplace, how are we going to eat the panettone?

It was Sarah from Maison Cupcake who made me puzzle over this question by setting this month's Fresh from the Oven challenge to be Panettone. Of course there's no need to have a fireplace in order to eat panettone, but we've eaten it only that way.

Several years back, the day after Christmas, we were having our five o'clock coffee with Ivan's parents in their home. Ivan's father had just returned from a business trip to Italy and had brought along many delicious treats for us, one of those being panettone.

We were sipping our coffee, trying from the various sweets, having sweet talks and waiting in anticipation. Ivan's father had placed the panettone(as it is in its cellophane wrap) in front of the burning fireplace. He's been rotating the loaf once in a while and when it got warm and buttery from all the sides, he shook the cellophane wrap vigorously and all the icing sugar glued to the buttery crust. Usually I do hate sweets with icing and sugar on top, but when it's about panettone – bring it sugary! Besides of being cozy, the warmth of the fireplace makes the panettone melt in your mouth. It's a mere bliss.

From that 5 o'clock coffee on we've been eating panettone only when visiting Ivan's parents, in front of the fireplace. Till now.

But panettone is good no matter where you eat it, since it brings the cozyness of the coming holidays – my favourite time of the year.

I wanted the loaf to be loaded with dry fruits and considering that I put 200 grams of candied and dry fruits (that look like quite a lot) the end result wasn't as exuberant as desired, so the next time I'm making it I'll try with 300 grams of fruits. And surely I'll make it soon, to bring along to Vetren where we could enjoy it in front of the fireplace.


Panettone
Recipe:
Makes 1 loaf (15cm in diameter)
  • 400 gr all purpose flour, sifted;
  • 80 gr confectionner's sugar, sifted;
  • 15 gr fresh yeast;
  • 120 gr whole milk, lukewarm;
  • 100 gr soft butter;
  • 2 eggs;
  • 4 gr salt;
  • zest of 1 lemon;
  • 200 gr candied and dry fruits – we used 65 gr candied orange peel, 35 gr dry apricots, 50 gr sultanas, 30 gr sour cherries soaked in rum, 20 gr dry cranberries. 

  • Butter and confectionner's sugar for finishing.

In a small bowl, prepare the sponge by combining milk and yeast, stir to dissolve the yeast. Then add in 100 gr of the flour, cover and leave it to double in bulk.

In a large bowl, combine the rest of the flour, sugar, salt, lemon zest, mix well. Then add in the sponge, soften butter and eggs. Mix using your hand or stand mixer till dough forms and then for 10 more minutes to develop the gluten. Cover and leave it to double in bulk, but do not leave it in a warm place in order not to let the butter melt. In our kitchen it's 18ºC (in the winter), so the temperature is ok, but if you wish you could leave the dough in the fridge overnight.

When doubled, knock the dough down. Give it a quick knead in order to let the gas escape and while kneading incorporate the fruits. Form the dough as a ball and transfer it to a lined with paper baking dish – we have no panettone dish so we used a 15 cm oven-proof double bottom saucepan. Cover the dish with a clean towel and leave the dough to double again.

Preheat the oven to 200º C with the rack on the lower third of the oven. Dot the top of the panettone with butter and bake for 10 minutes, then reduce the temperature to 180º C and bake for 40 more minutes.

Remove from the oven, spread a generous quantity of butter on top of the hot panettone, then sprinkle with confectionner's sugar.


In a couple of days the round-up will be on the Fresh from the Oven site, so go there to see how everybody's panettones have turned out.

Saturday, October 29, 2011

Cinnamon Roses


I was in a “play with dough” mood. Besides I wanted to try my hands on bread roses for a long time. And since it looked like as if the weekend's gonna be completely featureless and dull – Ivan was out of town and I was having a cold – it was just the perfect time for some dough work as a way to push myself off from the burning sensation in my sinuses. And this month's Fresh from the Oven challenge was more than appropriate for this occasion.


It was Claire from Things We Make who set the challenge to be cinnamon rolls.

I wanted my rolls to resemble tiny one bite roses but they proofed more than expected and appeared to be not so tiny ones. Never mind, I liked how they tasted, and especially their caramelized crunchy bottoms.

Note that these cinnamon roses are best if eaten while still warm since they are small and all those petals become dry very quickly. Maybe if there was icing on top, it would have helped to keep roll fresh longer but I hate how the sugar icing tastes. The roses could also be made bigger, thus they would be kept fresh and soft longer.


Cinnamon Roses
Recipe:
Makes: 24 roses
For the Dough
  • 300 gr all purpose flour, sifted;
  • 7 gr fresh yeast;
  • 150 gr buttermilk;
  • 25 gr sugar;
  • 25 gr melted butter;
  • 2 gr salt;
  • 1 egg yolk;
  • pinch of grated nutmeg.
For the Filling:
  • 50 gr soften butter;
  • 60 gr light muscovado sugar + more for dipping;
  • 1 tsp cinnamon.
Dissolve yeast in buttermilk. Combine flour, sugar, salt and nutmeg. Add in buttermilk, egg yolk and melted butter. Use your hand or stand mixer equipped with dough hooks and mix till dough forms then knead for 10 more minutes to develop the gluten. Cover the dough and leave it to proof till double in bulk.
Knock the dough back, give it a quick knead to let the gas escape. Roll the dough out to 2mm thickness. Using a 4,5 cm ring, cut 11 disks for each rose. Line up dough disks slightly overlapping each one. Spread on a nice layer of butter, then sprinkle some light muscovado sugar and cinnamon over the butter. Carefully roll up disks, making sure to not put any pressure on the edges, but do press in the center of the roll to adhere the disks. Use scissors to cut the roll in two. So now you have two roses. With your fingers, stretch out the rose's petals to burst the rose into bloom. Brush some soften butter onto roses and dip them in light muscovado sugar, then arrange them onto a lined with paper baking sheet spacing them 3-4 cm apart since they will expand during baking.< Bake into a preheated to 220ºC oven for around 20 – 22 minutes. Eat while still warm.

Here is an example of how dough roses are being made.

We've sent these cinnamon roses to Susan for her YeastSpotting showcase.

Thursday, October 27, 2011

Povitica


Povitica is a Central European holiday cake/bread also known as potica or nut roll. It is typical for Slovenia, Croatia, Poland, Slovakia and Hungary and its name means something like “rolled up”.
We were not familiar with this bread and it was fun making it (as well as eating it) while taking part at the October's Daring Bakers Challenge which was chosen by Jenni from The Gingered Whisk.


The bread turned out to be very delicious with all that cream inside. We made two loaves with different fillings – walnut one and poppy seed one. Although the poppyseed filling contains a couple of spoonfuls of the walnut filling, since we were short of poppy seeds.
We liked both of the fillings but we liked the poppy seed one a little bit more.


Povitica Recipe:
Makes: 2 loaves (using 20x10cm loaf pans)

For the Dough:

  • 610 gr all purpose flour;
  • 50 gr lukewarm water;
  • 10 gr fresh yeast;
  • 240 gr whole milk;
  • 60 gr butter;
  • 85 gr sugar;
  • 9 gr salt;
  • 2 eggs;
  • freshly grated zest of 1 lime or lemon.

Dissolve yeast in the water. Then mix in 50 gr of the flour. Cover and leave it to double, even triple in bulk.
In a saucepan heat milk together with the sugar and butter just until the butter is melted and the sugar is dissolved. Leave to cool to lukewarm.
In a big bowl mix together the rest of the flour, salt and lime zest Add the lukewarm milk-butter-sugar mixture, the pre-fermented dough and the eggs, and using a hand (or stand) mixer equipped with dough hook knead to form dough and then for 10 more minutes to develop the gluten. Cover the dough and leave it to double in bulk. The time depends considering the room temperature.(Meanwhile, prepare the fillings and butter 2 loaf pans 20x10cm.)
Knock the dough back. Give it a quick knead on a floured counter top in order to let the gas escape. Divide the dough in two equal parts (for making two breads). Divide each part in 3 balls – thus it would be easier to roll it out. Roll each ball out to a very thin sheet, so thin that you could see through it. Spread over a thin layer of the filling and roll the dough sheet up. Place the roll into a buttered loaf pan , fold it two or three times if needed. Proceed the same way with the rest of the dough.
Cover pan with plastic wrap or a clean towel and leave the to proof for 30 – 40 minutes.
Preheat oven to 180ºC. Brush the top of the loaves with milk and bake for 15 minutes, then turn down the temperature to 150ºC and bake for further 45 minutes or until done.
Remove loaves from the oven and leave them to cool as they are - in the pans – this would help the loaves to hold their shape.
Jenni's tip: It is recommended that the best way to cut Povitica loaves into slices is by turning the loaf upside down and slicing with a serrated knife.

For the Walnut Filling:
It's a nice and very easy filling, but I find mum's walnut filling to be better, although a little bit more complicated.
  • 280 gr ground walnuts;
  • 60 gr milk;
  • 60 gr butter;
  • 125 gr sugar;
  • 1 Tbsp cocoa powder;
  • ½ tsp cinnamon;
  • 1 egg;
  • 1 Tbsp rum.
Bring milk, butter and sugar to a boil. Remove from the stove and add in ground walnuts, cocoa and cinnamon. Mix well to combine, add in the egg and rum and mix again. If the mixture thickens, add a small amount of warm milk.

For the Poppy Seed Filling:
Initially we intended to make this filling but the amount of the poppy seeds we had was too little, so we had to improvise and we ended up with this:
  • 85 gr blue poppy seeds;
  • 35 gr almond meal;
  • 30 gr finely chopped sultanas;
  • 30 gr milk;
  • 20 gr sugar;
  • 25 gr jaggery (melted);
  • 1 Tbsp rum;
  • 2 or 3 Tbsp from the walnut filling (actually we added what's been left after rolling the first loaf).
Heat milk and sugar in order to dissolve sugar. Then add in the rest of the ingredients and mix well.


Wednesday, October 19, 2011

Twisted Baguette


It makes me feel cosy. That aroma that comes out of the oven while baking bread is what I'm talking about. That odour evokes images of perfectly crunchy crust. Have you ever thought about this – one could actually smell the crust. By the aromatic molecules coming out of the oven one could say if the crust is crunchy or soggy, if the middle is well balanced or the bread magic didn't worked out. Well, this one has definitely made it.


Whenever you see a nice looking(and tasting) bread on this blog you should know it is Ivan involved. Maybe it's because it's simply in his blood, since he is a third generation baker, but whenever Ivan makes bread it's like the bread gets alive. Not in the monstrous way though. But if there were a bread spirit, it would have filled the air of our kitchen. Oh, wait, maybe there is, since the whole apartment smells of this gorgeous baguette.(There were three of them, but... you see... some people, I won't give names... were very hungry. Oups.) And just to keep the game going on – it's twisted. You'll find it also on Yeastspotting.


Twisted Baguette Recipe:

For the dough we used our regular bread dough recipe. Usually we use less yeast than it is normally needed, but we like prolonging the fermentation process. This gives the bread a more complex flavour profile.
The water content varies and depends on the flour. The ability of the flour to absorb water vary according to the producer, the wheat quality, the grinding mode and the climate where you live. Considering we live by the sea and it's humid here, you may need to add more water.

For the Dough:

  • 500 gr all purpose flour (sifted);
  • 280 – 300 ml lukewarm water;
  • 8 gr salt;
  • 1 Tbsp sugar;
  • 10 gr fresh yeast.

For finishing:

  • 1tsp all purpose flour – 5 gr;
  • 8 to 10 times more water (in comparison with the flour) – around 45 gr;
  • white sesame seeds;
  • blue poppy seeds.
Dissolve yeast in 100 ml of the water. Then mix in 100 gr of the flour. Cover and leave it to double, even triple in bulk.
In a big bowl mix together the rest of the flour, salt and sugar. Add the rest of the water and the pre-fermented dough and using a hand (or stand) mixer equipped with dough hook knead to form dough and then for 10 more minutes to develop the gluten. Our hand mixer gives up very quickly so it's needed some hard hand kneading. Cover the dough and leave it to get doubled in bulk. The time depends considering the room temperature.
Knock the dough back and divide it into 3 equal parts from which to form 3 long logs.
For finishing – make scalded flour – bring the water to a boil then pour it over the flour whisking vigorously to prevent lumps from forming. The mixture should have a custard like thickness.
Usually scalded flour is being used to add some gloss and nice golden colour to the crust during baking. But in our case, we are using it as a glue.
Brush with scalded flour a lengthwise strip on top of each log. Then sprinkle exuberantly the brushed strip with white sesame seeds or just top. Tap it with your hands to assure the seeds are glued to the dough.
Flip logs on the other side and repeat the procedure, this time using poppy seeds.
Carefully twist each log several times. Place the three twisted logs on a floured kitchen cloths, leaving some space between them. Cover them and left the rest for 10 – 20 minutes for the final proof.
Preheat the oven to 220ºC with your stone in or as in our case – a sheet pan. Provide a steam source in the oven by placing a bowl of water in it. Transfer baguettes on the sheet pan and place them in the hot oven. When a crust starts to form (after around 10 to 15 minutes) remove the steam source and bake baguettes until golden brown.

PS. You see those tiny red and yellow tomatoes on the background - they are from our balcony. And these are of the few that those nasty caterpillars left for us.

Wednesday, October 12, 2011

Caramelized Chocolate Mille-Feuille with Strawberries


Do you feel that wind, do you smell it, do you taste it? That wind that autumn brings along her way.
The wind changes with seasons, with moods and thoughts. You could ride it sometimes, you know, or at least you think you could do so. But you could never tame it and it would never be yours.
I like it to be in my hair although sometimes I have this creepy feeling it could blow me away. Sometimes the wind teases me and tickles my ego, makes me think I could run with it or even better - I could outrun it. And then it changes its direction, all of a sudden. Bam. You stand still there in dismay and this is not your path any more, or was it ever? For a moment that looks so long you are lost in all the thoughts in your head. But then you are able to feel it again. This elusive but mesmerizing feeling that the wind calls you in attempt to seduce you once more. And you obey and start chasing after it one more time. And running along your way you feel safe again. With the wind on your side. With the wind in your hair.
It's only not to forget that it does not belong to you. It can't be tamed. But it could be a good friend of yours. No matter it would change its directions most unexpectedly. Bam. Just like that. To test you, maybe. Whether you can still feel it's breath. But it will be nearby, be aware. It will be there. Again in your hair.


Of course, the above has nothing to do with the recipe today. These were just some thoughts of mine from these rainy melancholic days which I needed to share. Or maybe, there is a linkage stronger than you thought as mille-feuilles are so fragile and brittle as if built by the wind.


Chocolate Mille-Feuille with Strawberries Recipe:
Makes 6

For the Caramelized Chocolate Pâte Feuilletée
Adapted from Pierre Hermé's Larousse du Chocolat

  • 140 gr all purpose flour;
  • 60 gr cold water;
  • 2 gr salt;
  • 23 gr butter (melted and cooled);
 
    • 140 gr butter;
    • 17 gr cocoa powder (we used Dutch processed);
     
      • granulated sugar for caramelizing – 1- 2 Tbsp.
      Combine flour and salt, then add water and melted and cooled butter. Mix with your hand or stand mixer equipped with dough hook until dough forms, then a further more couple of minutes in order to develop the gluten of the dough.
      Form the dough as a rectangle, wrap in plastic and refrigerate for an hour.
      Meanwhile, using the paddle attachment, cream the butter till smooth but still cold. Then add in the sifted cocoa powder and mix until it's totally absorbed. Wrap in plastic, trying to form a rectangle smaller than the one from the dough. Chill in the fridge.
      Lightly dust the counter top with flour. Roll the dough rectangle from the four sides forming a cushion mat in the middle. Lay the butter on that mat and fold the all four sides of the dough sealing the butter inside. Roll the dough out then fold it like you would fold a business letter. Rotate the “letter” short side down, roll and fold again. Wrap in plastic and refrigerate for an hour to chill.
      Repeat the rolling-folding procedure 5-6 more times with at least half an hour interval after each procedure. When all the folding is done, the dough could be refrigerated overnight or used the same day.
      Preheat the oven to 230ºC.
      On a lightly floured counter top, roll the dough out to a rectangle with thickness of approximately 4mm. At this point we divided the dough in two – one for Ivan and the other one – for me to work with.
      Ivan did as the recipe said – placed his whole sheet of pate feuilletee on a lined with paper sheetpan. As for me – I've cut mine to equal rectangles first. But honestly, I find the whole sheet method gave better results.
      Sprinkle sugar over the pate feuilletee, place it in the oven and reduce the temperature to 190C. Bake for around 8-10 minutes (depends if you bake a whole sheet or small rectangles) after which place a cooling rack on top of the pate feuilletee to prevent it from rising too much. Thus way, bake for 8 to 10 more minutes.
      Remove from the oven. Augment the temperature to 230C again. Place a sheet of parchment paper over the pate feuilletee and flip it over helping yourself with another sheetpan. Remove the top parchment. Now the sugared side should be toward the bottom. Place in the oven again and bake for further 3 minutes. Remove from the oven and let cool.
      Cut into equal rectangles. After all these baking procedures you see why it was easier to bake one whole pastry sheet instead of already cut rectangles. Besides, after cutting, the whole sheet made better, somehow flakier section.

      For the Pastry Cream:
      • 500 ml milk;
      • 1/2 vanilla pod;
      • 3 egg yolks;
      • 100 gr granulated sugar;
      • 40 gr corn starch;
      • 25gr butter.
      Dissolve starch into a little bit of water. Combine yolks, sugar and starch mixture and beat until pale.
      In a small saucepan bring milk and scraped vanilla pod to a simmer. Remove the pod and pour milk in a thin stream over the yolk mixture beating all the time. Return the mixture into the saucepan and cook to 85ºC (until it thickens). Cool in an ice water bath and when the temperature drops to 60C, stir in the butter Cover tightly with plastic foil in order not to form skin. Leave to cool completely before using it.

      For the Strawberries:
      Ivan wanted to use whole strawberries but since these were huge he had to cut them in quarters.
      I went on with strawberry jelly:
      • 260 gr pureed strawberries;
      • 30 gr sugar;
      • 3 gr agar agar in powder.
      Bring strawberry puree up to a simmer. Combine the sugar and the agar agar powder and add them to the puree. Stir while simmering for a couple more minutes till all the sugar and agar are dissolved. Pour into a 10cm ring laid over a silpat or parchment paper. Leave it to set. It will set even at room temperature since the agar starts to jellify at around 40C.
      When the jelly is firm, use a 1,5cm ring to cut rounds. Then cut each round in two.

      To assemble:
      Lay a caramelized chocolate pate feuilletee rectangle, pipe some pastry cream and arrange strawberries or strawberry jelly. Repeat and finish with a pastry rectangle. Dust some icing sugar on top.

      Wednesday, September 28, 2011

      Fougasse Fresh from the Oven


      Like every end of the summer season I've turned myself onto a preserve mode. I feel like a squirrel who crams its tiny hollow with dry nuts till no free space is left. In my case the dry nuts are replaced by plums, tomatoes and red bell peppers. For the last two weeks the oven works almost every night. I'm using it as a dehydrator – fan function at 60 – 70ºC. Bell peppers, if on slices are completely dry in one night (in 2 – if left whole). Halved roma tomatoes and damson plums are ready in 2 nights.
      When Claire from Purely food set this month's challenge for Fresh from the Oven to be fougasse I was more than anticipating to use the dehydrated bounty I've piled up in the larder.
      I was the one who kneaded the dough but it was Ivan who made this beautiful leaf-like bread. We ate it with goat cheese and tomatoes. One segment of the leaf left and Ivan cut it into thin slices and made bruschetti out of it – they were gorgeous with Fourme d'Ambert cheese.
      It was a wonderful and tasty challenge.
      Don't forget to visit Fresh from the Oven page to see other members' creations.

      Fougasse Recipe:
      • 240 gr all purpose flour;
      • 125 gr lukewarm water;
      • 20 gr olive oil;
      • 4 gr salt;
      • 1 tsp sugar;
      • 5 gr fresh yeast;
      • 1 ½ tsp fresh rosemary(finely chopped);
      • 1 Tbsp finely chopped dry tomatoes;
      • 1 Tbsp crushed dry sweet red peppers;
      • 1 Tbsp finely chopped olives.
      In a large bowl, combine flour, salt, rosemary, dry tomatoes, dry peppers, olives. Mix well and make a well in the center.
      In a small bowl, mix together water, sugar and yeast, then pour this mixture over the flour mixture. Add olive oil. Use your hand mixer equipped with the dough hooks to form dough. Transfer to a lightly floured counter top and knead by hand for around 10 minutes to develop the gluten. Transfer the dough back to the bowl, cover and leave it to rise until double in bulk.
      Knock the dough back to a lightly floured counter top, give it a quick knead just to make it uniform and roll it out using a rolling pin or just stretch it with your hands.
      Use bench scrapper or pizza cutter to make cuts resembling leaf veins on the flat bread. Stretch the holes with your hands and carefully transfer the fougasse onto lined with paper baking sheet. Cover with a clean kitchen towel and leave it to rise for 20 minutes.
      Meanwhile preheat the oven to 220ºC. Brush the fougasse with olive oil and bake for 15 – 20 minutes or until golden. Take out of the oven and brush with olive oil again.
      Best if eaten right away.


      Tuesday, September 13, 2011

      Apple Cake and Banana-Jaggery Ice Cream


      I was working on another post that's been in my drafts for a long time when my sister called to say she is coming the next day and will be staying for two days before she flies back to Paris. So I wanted to bake something for her. Recently I saw this recipe for fresh apple cake with boiled cider at Jane's Sweets & Baking Journal and this boiled cider thing caught my attention.

      The problem was I had no boiled cider, nor even an ordinary cider. It's not very popular here and it's hard to find any.

      But earlier that day I bought some fine Italia grapes or at least I thought they were fine. They were indeed very sweet and flavourful but their skin was so hard and thick that it was a torture to eat them. So I made some grape juice, reduced it along with some Viognier and this resulted into super good syrup. I was thinking about making some apple ice cream using the reduced grape juice - wine syrup, but apparently I'd forgotten to put the bowl of the ice cream maker in the freezer.


      Two days ago I've made this banana ice cream (the recipe differs from our previous banana-jaggery ice cream) , just because I had bananas and no idea what else to do with them. And since it was already 2am when I finished with the baking I was tired to think what else to pair the cake with, so I decided to go with the banana ice cream. Nice, because it matches perfectly.

      I must say, this is not the first recipe I'm trying from Jane's journal. Remember the cream-cheese cake for my sister's birthday – I've made it maybe ten times since then and it's one of my favourite tea cakes. This cake is as equally good.

      I'm still in a mood to bake something with the reduced wine-grape juice, so any suggestions are welcome.


      Fresh Apple Cake Recipe:
      Adapted from Jane's Sweets & Baking Journal 

      Makes: One 23 cm (9") cake, baked in a springform pan.
      Since my pan is 26cm in diameter I had to put a smaller pastry ring in the middle of the pan in order to fake a 23cm pan. This reflected on the baking time and the cake was ready much quicker than the suggested 55-60minutes.

      • 2 large tart apples (I used Granny Smiths) - peeled, cored, halved, and sliced into 1-2mm thin pieces;
      • 3 Tbsp (30 gr) reduced grape juice – wine syrup (recipe – down bellow);
      • 270 gr all-purpose flour;
      • 10 gr baking powder;
      • 3 gr salt;
      • ½ tsp ground cinnamon;
      • 1 pinch ground nutmeg;
      • 1 pinch ground cloves;

      • 170 gr unsalted butter (at room temperature);
      • 50 gr granulated sugar;
      • 3 large eggs;
      • 1/2 tsp. vanilla extract;
      • 2 Tbsp (20gr) milk.

      Preheat the oven to 180ºC and place the rack in the middle. Line the bottom of the baking pan with parchment paper circle.
      In a medium bowl, mix together apples slices and reduced grape juice-wine syrup. Set aside.
      In another bowl, whisk together the flour, baking powder, salt, spices.
      In a large bowl, using the paddle attachment, beat the butter and sugar together on medium speed until fluffy and light. One at a time, beat in the eggs, still on medium speed. Add in the vanilla and milk.
      Set a colander over an empty bowl and dump the apples along with their liquid into it. Let them drain a minute or so. Then add the drained liquid to the above mixture. Beat in half of the flour mixture. Since the batter is quite thick you may wish to use a rubber spatula to fold the the rest of the flour mixture, but I kept going with the mixer, I was just taking care not to scatter the kitchen with flour.
      Spread evenly half of the batter into the bottom of the prepared springform pan. Use a small offset spatula, or the back of a spoon, to spread it out.
      Scatter all of the apples over the top of the batter, there is no need for them to be neatly arranged; try to leave just a narrow margin of uncovered batter close to the sides of the pan.
      Plop the remaining batter over that and spread it out smoothly.
      Bake until golden brown – the recipe suggests 55-60 minutes, but my cake was ready in 40-45minutes.
      Cool the cake in its pan for at least 15 minutes before attempting to remove the sides of the pan.

      Reduced Grape Juice-Wine Syrup Recipe:

      • 600 gr white grape juice (I used Italia variety);
      • 100 gr floral and aromatic white wine (I used Viognier).

      Place grape juice and wine in a saucepan and let simmer on medium-low heat until the mixture reduces to around 200gr. The reduced syrup has a nice caramel colour and is viscous like apricot nectar.

      Banana - Jaggery Ice Cream Recipe:

      • 2 egg yolks;
      • 60 gr granulated sugar;

      • 40 gr jaggery;
      • 400 ml whole milk;
      • 150 ml whipping cream;
      • 4-5 very ripe bananas;
      • 1/3 tsp ground cinnamon;
      • 25 ml rum.

      Beat egg yolks and sugar until pale.
      In a saucepan bring milk, whipping cream and jaggery up to a simmer. Pour a small amount of the hot milk mixture over the yolks-sugar mixture to temper, then pour over the remaining milk. Stir well and pour back in the saucepan. Cook over medium-low heat till the mixture reaches 85º C.
      Let the custard cool completely.
      Cut bananas into large chunks and place them into the bowl of the blender. Pour over the rum and enough custard just to cover the bananas, add in the cinnamon and puree. Mix with the rest of the custard and refrigerate for at least 4 hours. Then proceed according to your ice cream maker instructions.


      Friday, September 2, 2011

      Chocolate Cake & Pear Ice Cream


      Ice cream maker had been on my wish list for a very long time. My heart's been set on pacojet but it's price was whispering into my ear “Have you gone nuts?! This costs more than our car!”
      We were not even looking for such a gadget when we saw a small Kenwood model on our way home from a morning coffee with some friends. As soon as we get home we washed the machine and put the bowl in the freezer. The instructions are saying to freeze the bowl for 24 hours before using, but who's having patience to do that especially when it's a brand new toy. So 4 hours later we were trying to churn out some frozen yoghurt. Of course nothing came out of this. Obviously more time was needed for the bowl to freeze, so we had to wait until the next day.

      This time there was time enough to make a custard based ice cream but we didn't want the custard to taste as eggy as a custard normally tastes. This is why we used less eggs and the result was good – the egg yolks were enough to give a smooth consistency while the egg taste wasn't overwhelming. We had some pears on hand and it became a pear ice cream.

      Pears do pair well with chocolate so we baked this very quick cake. As a note about the cake I could say I prefer it eaten on the next day as thus the flavours are having time to blend completely.


      Chocolate Cake Recipe:
      Adapted from the recipe for Gâteau au Chocolat de Nancy from Pierre Hermé's Larousse du Chocolat

      • 100 gr chocolate 70% cocoa (although we used Cacao Barry's Tanzanie chocolate which contains 75% cocoa);
      • 100 gr butter;
      • 3 egg yolks;
      • 3 egg whites;
      • 50 gr granulated sugar;
      • 35 gr almond meal;
      • 40 gr cake flour.

      Preheat the oven to 170ºC.
      Butter or line with paper a 20x10cm loaf pan.
      Sift together flour and almond meal, set aside.
      Melt butter along with chocolate in the microwave taking care not to burn them. Beat in the egg yolks. If the temperature of the butter-chocolate mixture is too high wait until it drops in order not to make poached yolks. Then add in the almond-flour mixture.
      In a separate bowl beat egg whites and sugar to stiff glossy peaks. Add a third of the beaten egg whites to the above mixture to soften it a little, then fold in the rest of the whites. Pour into the prepared cake pan and bake for approximately 35 - 40 minutes.

      Pear Ice Cream Recipe:
      • 2 egg yolks;
      • 80 gr granulated sugar;
      • 400 ml whole milk;
      • 200 ml whipping cream;
      • 2 pears;
      • 30 ml water;
      • 1 tsp powdered gum arabic (if it's in crystals, soak them in the water first; if you don't have it, skip it) – it's used to prevent crystals from forming and it could be added either with the milk or with the water;
      • cinnamon stick;
      • 1 clove bud;
      • 3 cardamom pods;
      • 15 ml rum.

      Beat the egg yolks and half of the sugar until pale.
      In a saucepan bring the milk and the rest of the sugar up to a simmer. Pour a small amount of the hot milk over the yolks-sugar mixture to temper, then pour over the remaining milk. Stir well and pour back in the saucepan. Cook over medium-low heat till the mixture reaches 85º C.
      Let the custard cool completely.
      Peel and core the pears, then cut them into small pieces. In a saucepan, over medium-low heat, combine pears, water, gum arabic and spices. Cook until the pears are soft. Let cool. Remove spices and puree the pears.
      Combine custard, pear puree and rum, refrigerate for at least 4 hours.
      Whip the cream. Gently fold the whipped cream into the pear custard. Proceed according to your ice cream maker instructions.


      Tuesday, August 30, 2011

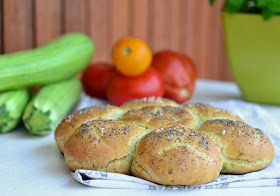
      Courgette Bread


      We've missed the last few Fresh from the Oven challenges due to travelling here and there, but we couldn't miss this one, since it's our friend Sally from My Custard Pie hosting. Sally's blog is one of my favourite to read. This woman has the ability to always catch my attention. I love the way she writes. Reading her posts one never knows what she would start and end up with. Sally could make an ordinary life story attain such a deep spiritual meaning and at the end completely keeping pace with the story she would offer you something delicious bursting out of warm cosiness. She's always extremely positive and cheerful, and like a real English lady, she has a lovely sense of humour.


      Sally challenged us to make courgette cluster bread which was a good reason for us to bake with vegetables again. We've made pumpkin bread before, which was very good, but somehow we are always too lazy to try it again. Plus we had a lot of vegetables from Ivan's parents.

      We've twisted a little bit the original recipe according to which the salted grated courgettes must be drained form the water(which is supposed to be discarded), then washed and dried. Instead this we went with draining the courgettes but keeping their water as a liquid part for the dough. If I am to lie I would say thus the bread would have a more prominent courgette taste. But the truth is we found it easier to skip the washing an drying process by simply using the drained liquid. Also, this way it was easier to figure out the amount of salt needed.

      There was parmesan used in the recipe that would give a cheesy tinge of this bread, but we had non of it in the fridge, if you do have any, add some in the dough.

      And the last change – we added dill weed since it's like a habit to me – when there are courgettes, there is dill weed.

      The bread was super delicious, even to be eaten plain, on its own. We even ruined the rule “first shoot, then eat” since I was too eager to try it.

      Go visit My Custard Pie for the original recipe and do cast a glance at what the other FFO members have come up with.


      Courgette Bread Recipe:

      • 450 gr courgettes, grated coarsely;
      • 10 gr salt;
      • 675 gr strong white bread flour;
      • 20 gr fresh yeast (or 2 sachets of easy-blend/fast-action yeast, or 14g instant dried yeast);
      • 1Tbsp sugar;
      • 80 ml tepid whole milk;
      • 25 ml olive oil;
      • 1 heaping tablespoon dried dill weed;
      • milk, to glaze;
      • sesame seeds, poppy seeds, to sprinkle.

      Mix grated courgettes with salt, place them in a colander and leave them for an hour in order to drain away the liquid. Do not discard the drained liquid, collect it as it will be used later.
      Combine milk and fresh yeast, set aside.
      In a large bowl sift together flour, dill weed and sugar. Make a well in the center, then pour in the milk-yeast mixture, olive oil, the liquid drained from the courgettes and the courgettes themselves. Mix with hand mixer equipped with dough hooks to form dough. Knead on low speed for 10-15 minutes. (The dough could be kneaded by hand but since it's a little bit sticky, it's easier to use hand or stand mixer equipped with dough hook.) Cover the dough and leave it to rise for about an hour, or until doubled in size.
      Transfer the dough to a floured counter top and shape it the way you like. Here we've used two thirds of the dough to make small buns and the other third has been used for the flower cluster bread. Place on a lined with paper baking pan and leave to prove, covered with a linen tea towel for about 30 minutes, or until doubled in size.
      Preheat the oven to 180. Provide some sort of steam source – we are placing a small pot with hot water in the oven. Glaze with milk, sprinkle some seeds on top. Bake with steam for the first 10 minutes then continue without the steam source, until nicely golden. Remove from the oven and cover with a clean linen towel to keep the buns soft.